

I was looking for a cheap door sensor to be integrated into my Home Assistant system. I found some commercial devices that I tried to Tasmotize with wrong results, and other Zegbee units, but I currently don’t have any Zegbee gateway, so I decided to try to create a device to easily integrate into HA by MQTT, in the same way I did with some nodeMCU boards for light or irrigation control.
I made a video to show how easy is to create and install this sensor. I hope you find it useful:
GitHub repository:
1 – Material needed
Electronics:
- ESP-01 board (don’t use ESP-01s)
- 2xAAA battery box.
- Perforated board.
- Additional electronic components:
- Reed sensor.
- 1 capacitor 10uF.
- 1M resistor.
- 100k resistor.
- 100 ohms resistor.
- 1 diode.
Other:
- Magnets (I used some magnets I had on the fridge door)
- A housing or 3D printer to make the box (see STL files)
2 – BOM & budget
| Image | Component | Link | Cost |
|---|---|---|---|
 | ESP-01 board | https://es.aliexpress.com/item/32582736130.html | 1,58 € |
 | AAA Battery box | https://es.aliexpress.com/item/33049875634.html | 0,48 € |
 | Reed sensor | https://es.aliexpress.com/item/32964640247.html | 2,18 € |
| TOTAL | 4,24 € |
Shipment costs included in the prices.
3 – Electronic scheme
Electronic scheme

Protoboard scheme

4 – Circuit functioning
The following circuit has a reed sensor with three terminals: Normally Open (short terminal) , Normally Close (long terminal) and Common.

When the magnet is not present the terminals are set as follows:
- Short terminal: Open
- Long terminal: Close
Obviously, when the magnet is present, the terminals are inverted:
- Short terminal: Close
- Long terminal: Open
Taking that into account, when the door is closed, the magnet is present and the circuit is closed through the 1M resistor.
However, when the door is open the switch connects the 100k resistor and produces a low pulse that wakes up the ESP01 through the RESET pin. This effect is displayed in the following simulation:
When the door is closed, the ESP01 goes into Sleep Mode for power saving.

Note: The 3,3k resistor is just the internal resistor of the ESP01 to create the simulation. Do not include it in the circuit.
Response times:
- Door opening: The response time for the activation of the sensor when the door opens is usually less than 1 second. This is the longuest process because includes: ESP01 wake up, start its code and connect to our WiFy router, then to the MQTT server and finally to send the message «Open». This is what takes the longest and you have to be very careful to configure the router and the device properly to reduce this time as much as possible. It is explained below.
- Door closing: This time is practically instantaneous because when the door is closed, it is already connected to the WiFi and the MQTT server and only has to send the “Close” message.
5 – Code and 3D
The code can be found in the following repo: https://github.com/Domaray/Home-Automation/tree/master/003-Door_sensor
5.1 – Arduino
The complete code for Arduino is in the repository. Here are just displayed the parameters to configure.
Firstly, you have to set the WiFi connection and the IP of the MQTT server. I work with the MQTT server installed as addon in Home Assistant so, in this case, the IP is the same as your Home Assistant.
The ClientID is an idetifier that must be unique in your network. In case you need several door sensors, set different names to each one. Otherwise you will experiment disconnections from the server.
#define wifi_ssid "YOUR WIFI SSID"
#define wifi_password "YOUR WIFI PASSWORD"
#define mqtt_server "IP OF MQTT SERVER"
#define mqtt_user "MQTT USER"
#define mqtt_password "MQTT PASSWORD"
#define clientId "Entry_door"  // THIS ID MUST BE UNIQUE.
It is highly recommended to set the IP of the device, gateway and mask in order to avoid DHCP and connect to WiFi faster. Also add the rule to your router to assign always the same IP to the MAC address of this device. The WiFi connection when the ESP01 wakes up will take longer in case you don’t configure it.
IPAddress ip(192, 168, 1, 120);
IPAddress gateway(192, 168, 1, 1);
IPAddress subnet(255, 255, 255, 0);
These are the topics used by MQTT. In case you want additional door sensors, just change the topic. For example: «home/sensor/door_2/state» .
#define topic_door_state "home/sensor/door_1/state"
#define topic_door_available "home/sensor/door_1/available"
#define topic_door_battery "home/sensor/door_1/battery"
5.2 – Home Assistant
The following code must be added into Home Assistant to integrate the door sensor.
configuration.yaml
This file contain the configuration needed to create the door sensor entities. Thereafter, reboot the server and add them on the Dashboard.
binary_sensor:
  - platform: mqtt
    name: "Main door sensor"
    state_topic: "home/sensor/door_1/state"
    payload_on: "ON"
    payload_off: "OFF"
    device_class: door
    qos: 1

sensor:
  - platform: mqtt
    name: "Main door sensor battery"
    state_topic: "home/sensor/door_1/battery"
    unit_of_measurement: "%"
    icon: mdi:battery
automations.yaml
I included an automation to notify to my mobile every time the door is opened.
- id: '1614703840000'
  alias: Main door - Open - Notification
  description: Mobile notification when main door is open
  trigger:
  - platform: state
    entity_id: binary_sensor.main_door_sensor
    from: 'off'
    to: 'on'
  condition: []
  action:
  - data_template:
      message: Main door opened
      title: Main door opened
    service: notify.mobile_app_xxx
  mode: single
Lovelace
entities:
- entity: binary_sensor.main_door_sensor
- entity: sensor.main_door_sensor_battery
title: Door sensor
type: entities
state_color: true
type: logbook
entities:
- binary_sensor.main_door_sensor
hours_to_show: 24
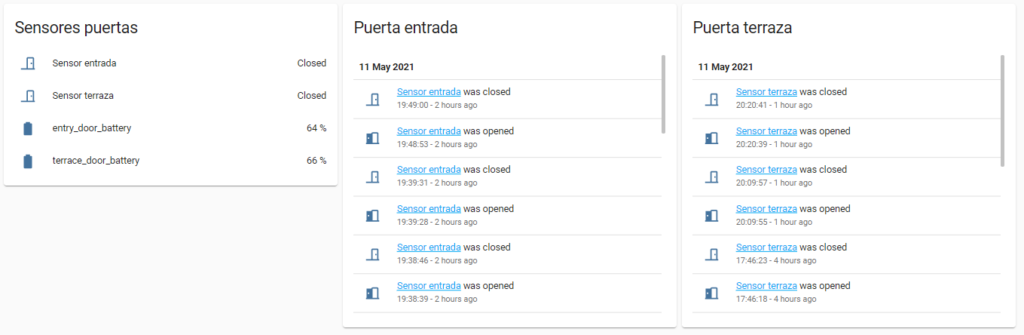
title: Door sensorThis will be the result
5.3 – 3D files
The following stl files (and the original FreeCAD) are in the repository:
- Housing Sensor
- Cover sensor
- Housing magnet
- Cover magnet
Just download them and put in action your 3D printer.

6 – Installation
The installation is really easy:
- Put a piece of double sided tape in the sensor cover and place it in the possition of the door you want to install it.
- Do the same with the cover of the magnet.
- Place the sensor in its cover that was previouly sticked to the door.
- Same with the magnet.
- Test they are correctly aligned and the reed sensor detects the magnet.
Comentarios